📋 Windows Access Guide
Account: Each user can create accounts on the [Account Management] page, and each account can have its own traffic threshold set separately.
Using Account to Login Device: Each device uses one account to connect to the proxy for convenience. Fill in the account name as the proxy username.
Switching IP:
Method 1: Switch IP by clicking the "Switch/Refresh IP" button
To switch the IP for the test1 account, select the test1 account from the account options on the left side of the "Proxy IP Configuration" page, then click the "Switch/Refresh IP" button to switch the test1 account's IP. As shown:
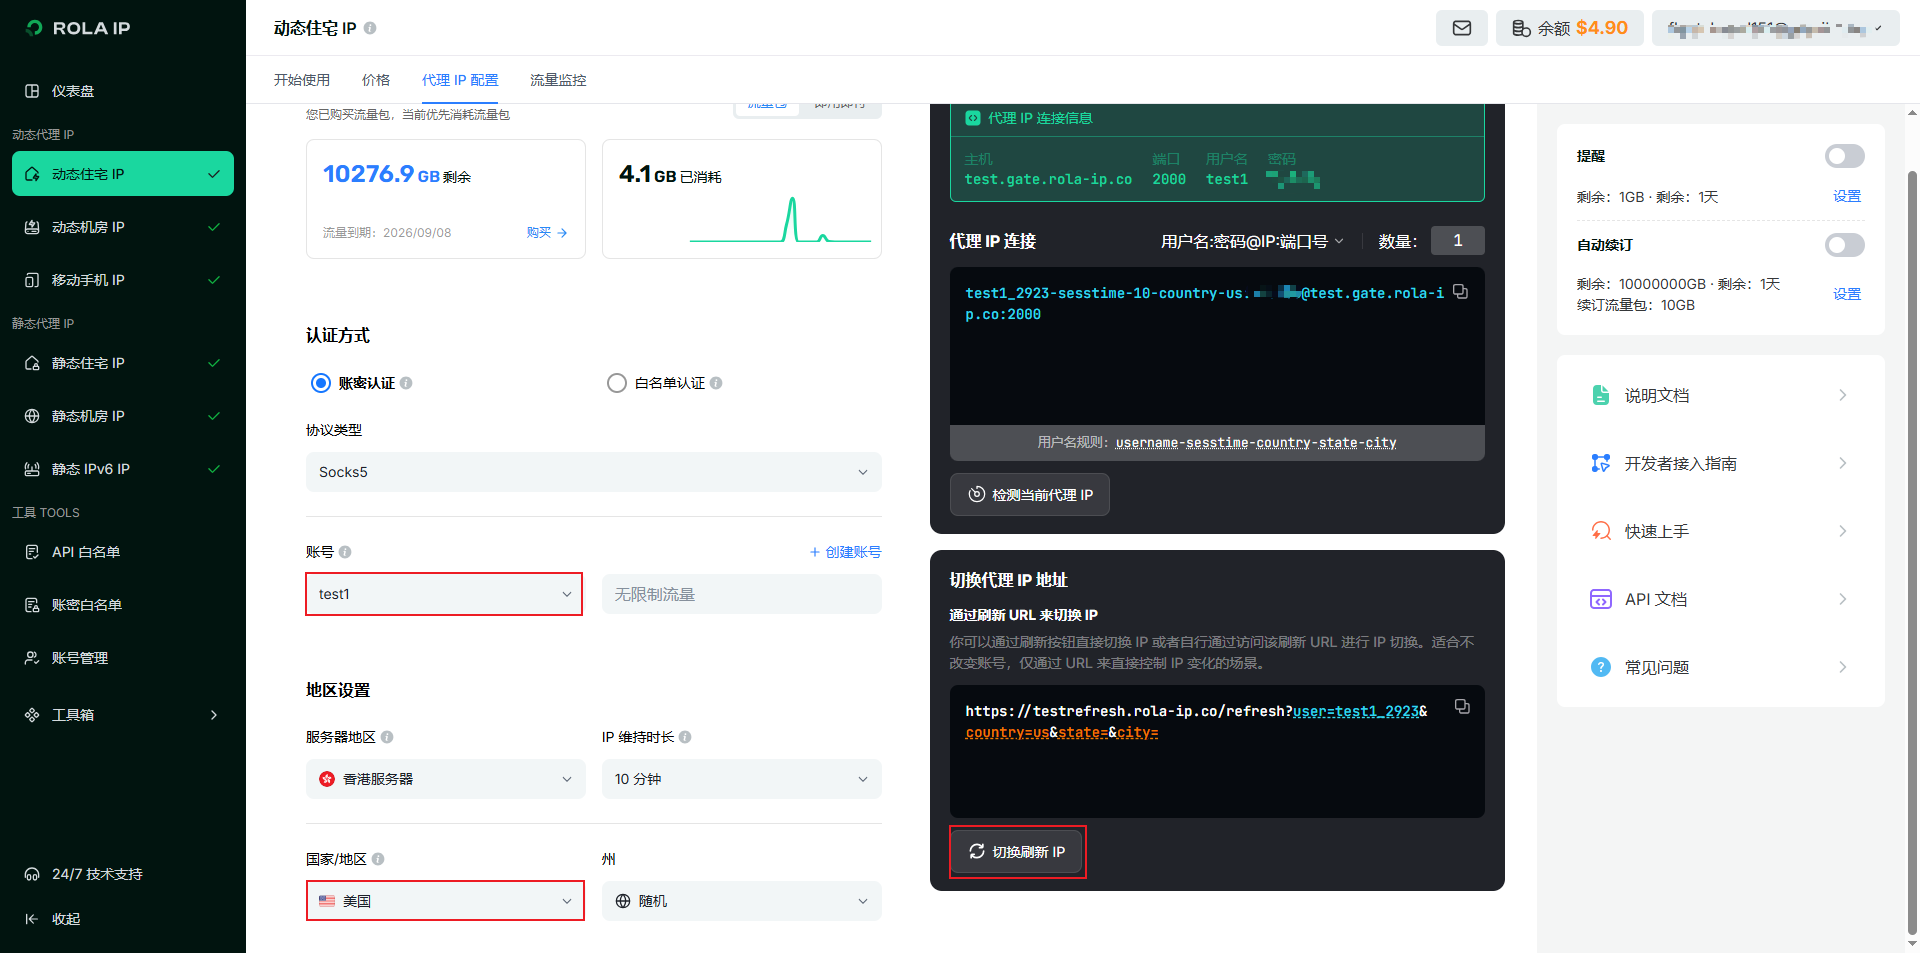 After switching, the test1 account's latest IP will be a US IP, while other account IPs will remain unchanged.
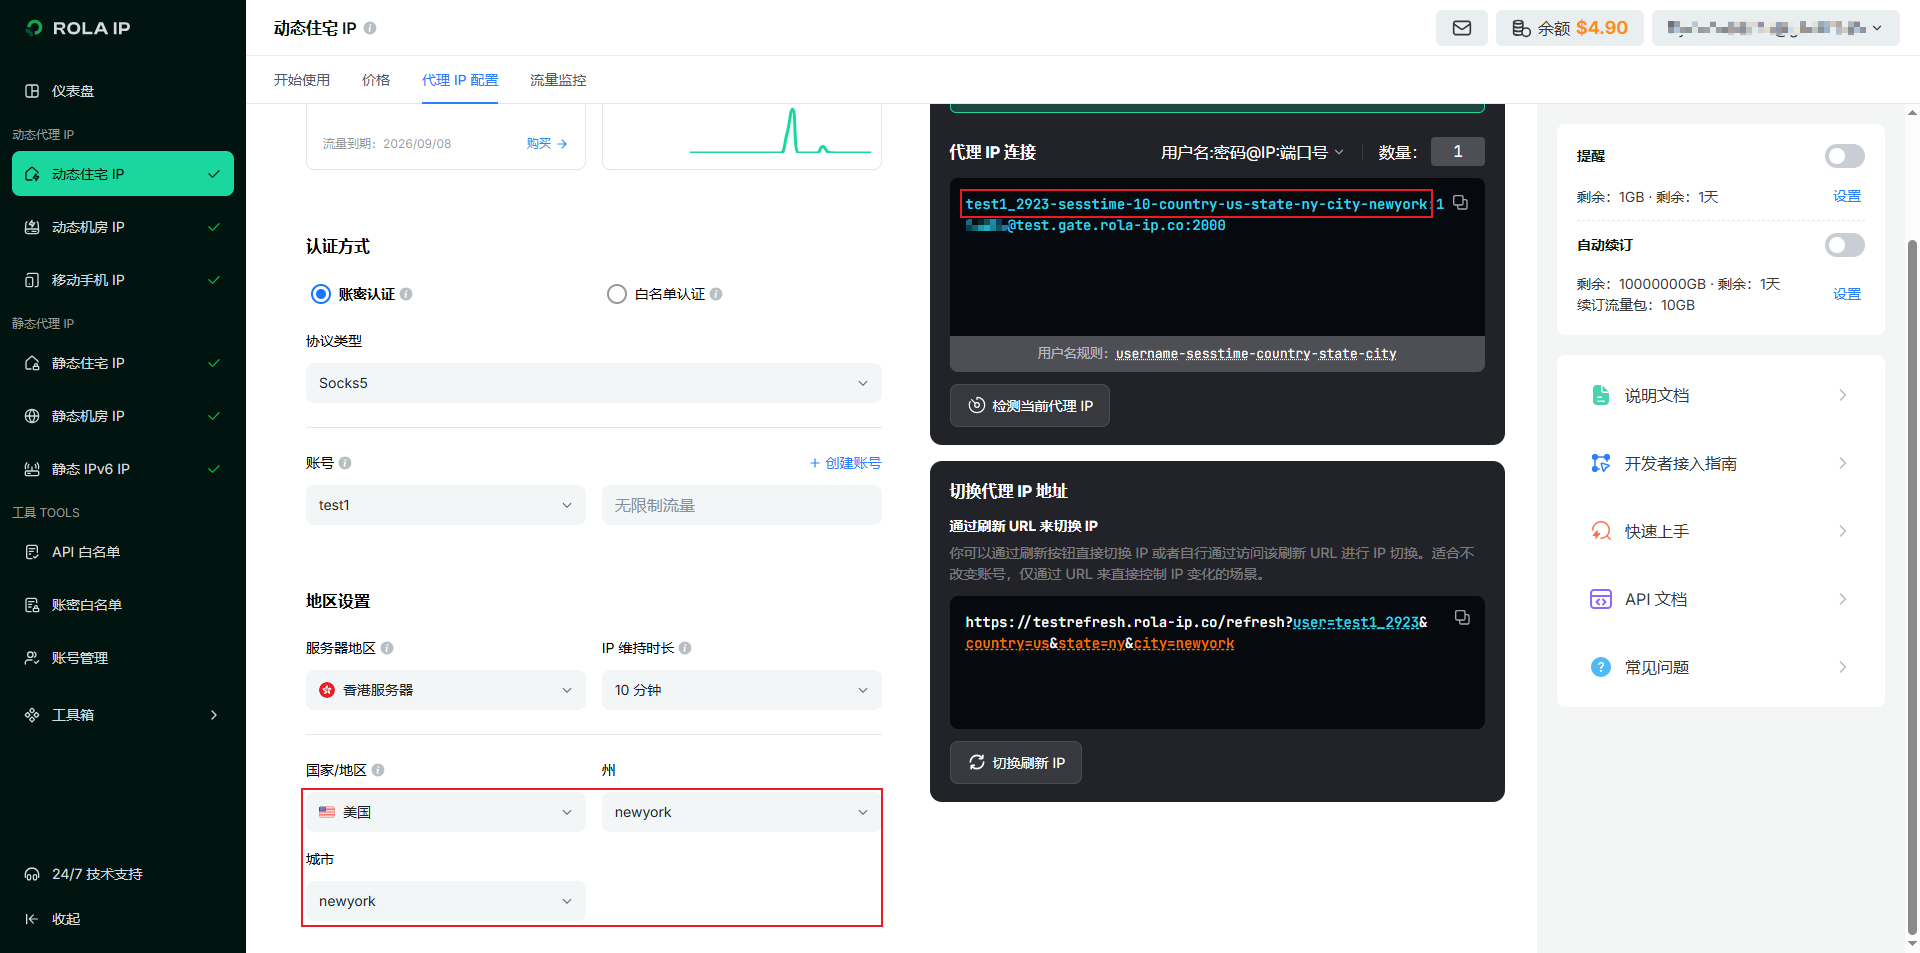
Method 2: Switch IP by changing account format
Specify IP country/IP state/IP city through account format:
- To specify account IP country, parameter format:
account-country-countryCode. Example:test1_7651-country-usformat represents a US IP. - To specify account IP country + state, parameter format:
account-country-countryCode-state-stateCode. Example:test1_778-country-us-state-nyrepresents an IP from New York State, USA. - To specify account IP country + state + city, parameter format:
account-country-countryCode-state-stateCode-city-cityName. Example:test1_778-country-us-state-ny-city-newyorkrepresents an IP from New York City, New York State, USA.
As shown:
- To specify account IP country, parameter format:
Traffic Summary and Billing by Account: For example, user tom's total traffic is the sum of all accounts such as test1, test2, test3, and billing is calculated accordingly.
💻 Windows Access Steps
Step 1: Download Proxy Software
Download "Proxifier", Click here to download
💡 Software Description
Proxifier is a powerful proxy software that allows any application to connect to the internet through a proxy server
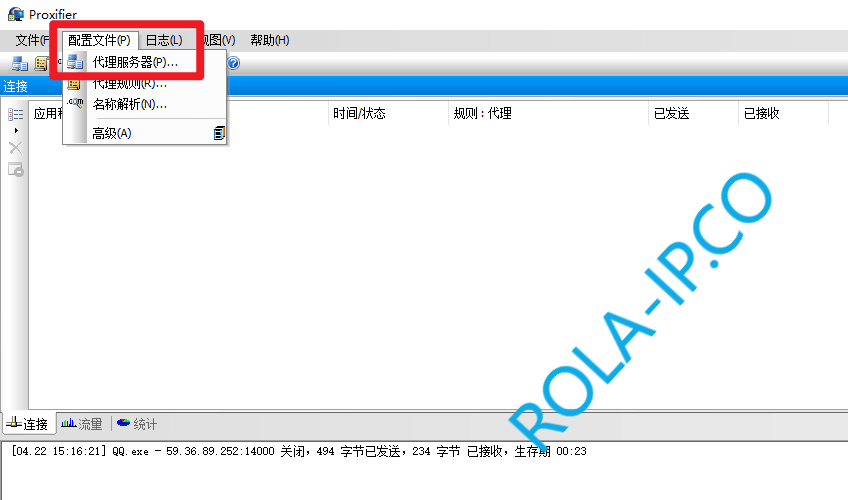
Step 2: Open Proxifier
Click "Profile" -> "Proxy Servers" in the menu bar
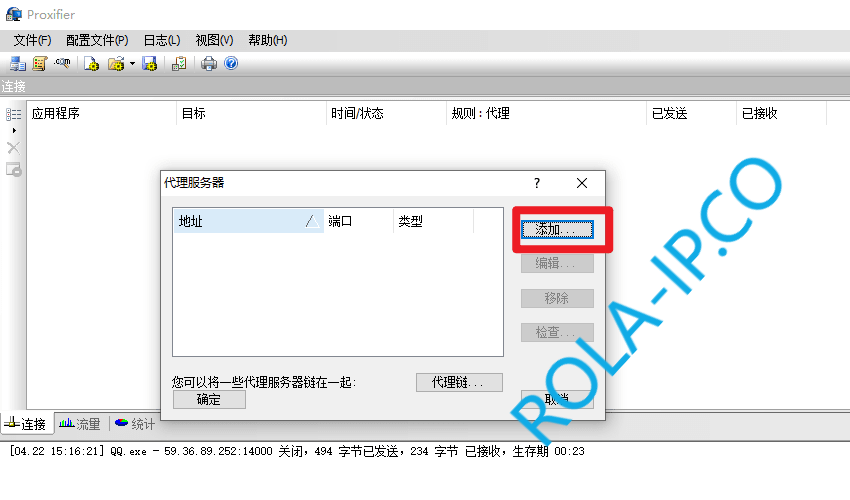
Step 3: Add Proxy Server
Click the "Add" button
Step 4: Fill in Proxy Information
Fill in "Server, Port, Protocol, User, Password". This information can be obtained from the rola backend (For example, select Overseas Residential IP >> Dynamic Residential IP >> Click Generate Proxy Information to view). After filling in, click "OK"
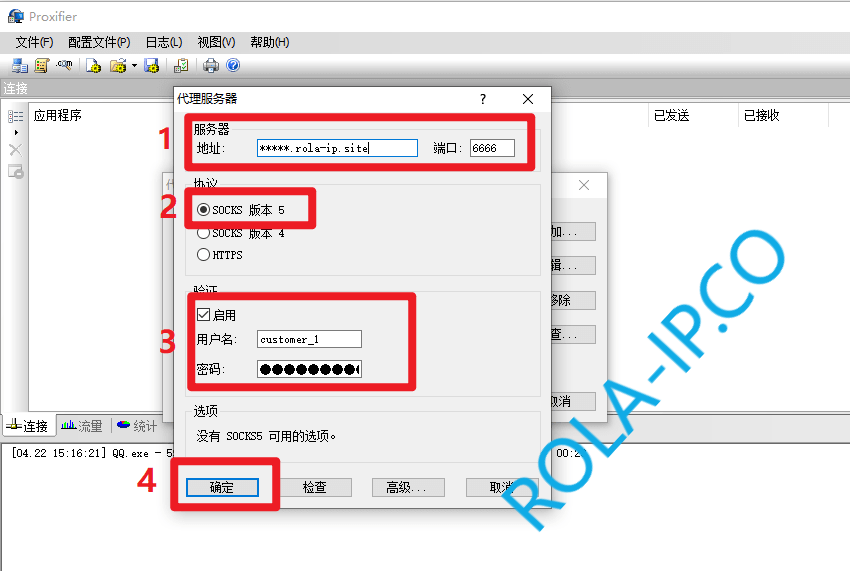
ℹ️ Obtaining Proxy Information
- Log in to Rola Admin Panel
- Select "Overseas Residential IP" >> "Dynamic Residential IP"
- Click "Generate Proxy Information" to view server address, port, username, password and other information
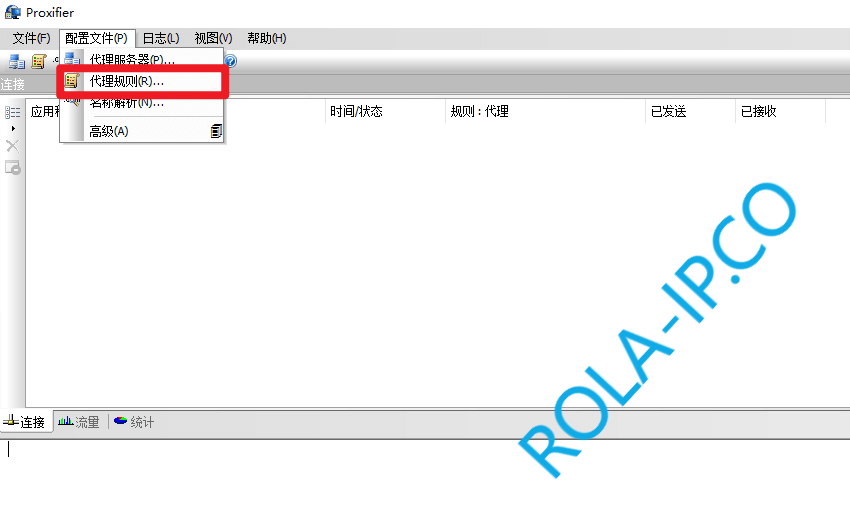
Step 5: Configure Proxy Rules
Click "Profile" -> "Proxification Rules"
Change both rules' actions to "Connect through proxy", then click "OK" after modification
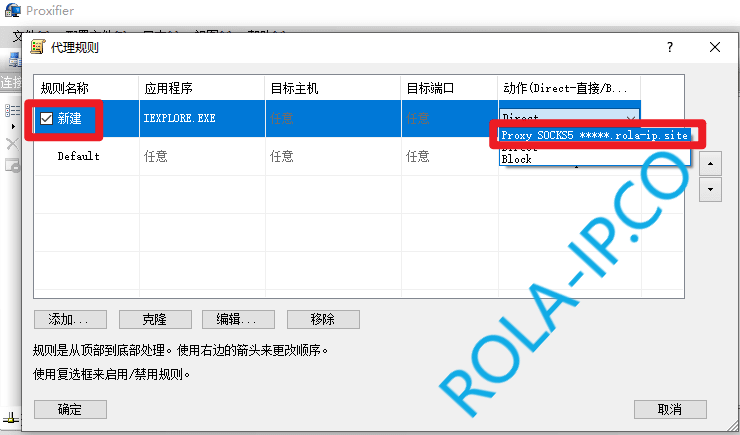
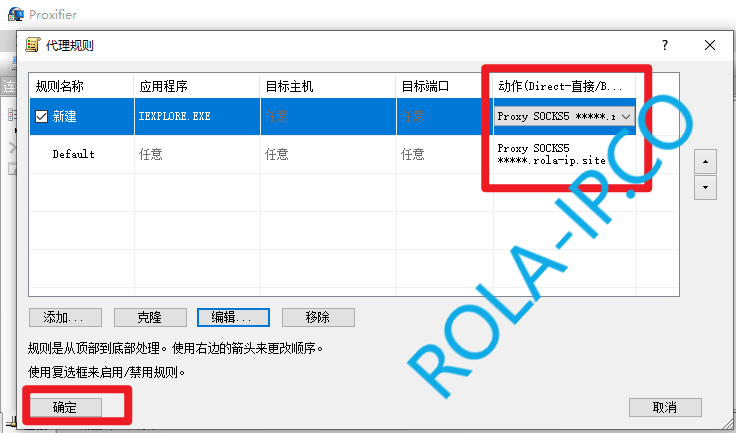
⚠️ Note
If you need to save traffic, you can set the rules for Rola websites (rola-ip.co, refresh.rola.vip) to "Direct Connection"
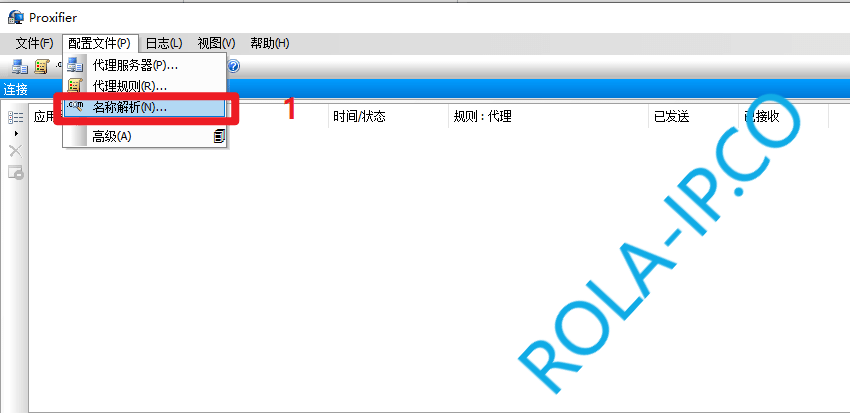
Step 6: Configure Name Resolution
Click "Profile" -> "Name Resolution", modify according to the following configuration, then click "OK"
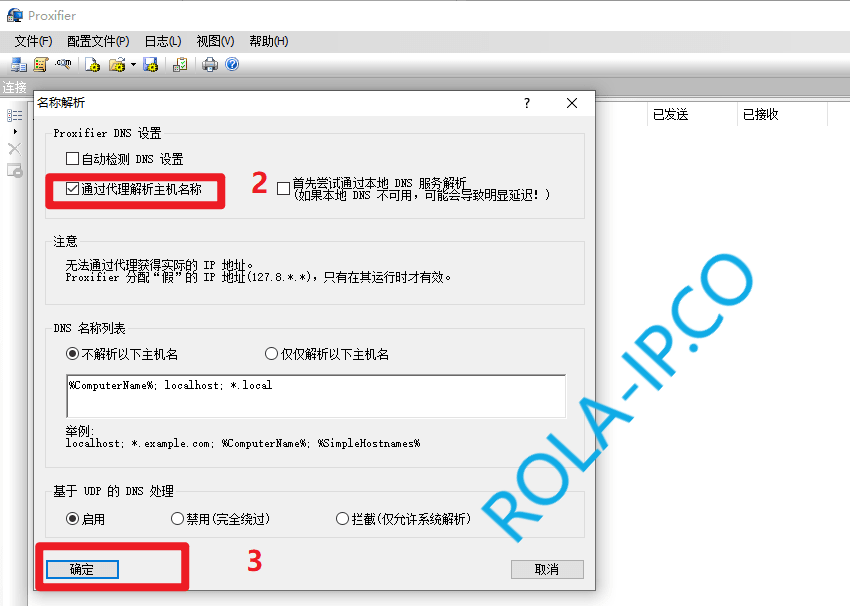
💡 Name Resolution Description
- Resolve through proxy - Recommended setting, DNS queries also go through proxy
- Direct resolution - DNS queries do not go through proxy
Step 7: Test Connection
After configuration is complete, you can test whether the proxy is working properly by visiting http://ip123.in.
If it shows a foreign IP, it means the proxy has been successfully configured!
📺 Video Tutorial
Video tutorial, click here to view
🔧 Common Issues
What to do if Proxifier connection fails?
Check if proxy information is correct
- Server address
- Port number
- Username and password
Check network connection
- Ensure the local machine can access the internet
- Check firewall settings
Check proxy server status
- Log in to the backend to check if the proxy is available
- Confirm account balance is sufficient
How to use proxy for specific programs?
- Open "Profile" -> "Proxification Rules"
- Click "Add" to create a new rule
- Select or enter the program path in "Application"
- Set action to "Connect through proxy"
- Click OK to save
How to view proxy connection logs?
At the bottom of the Proxifier main interface, you can see real-time connection logs showing:
- Which programs are using the proxy
- Target addresses being connected to
- Proxy servers being used
- Connection status
What to do if proxy speed is slow?
- Try switching to other sub-accounts
- Select IPs from geographically closer locations
- Check local network speed
- Switch IP in the backend and retry
💡 Usage Tips
Set auto-start on boot
- Open "File" -> "Options"
- Check "Run automatically at system startup"
Create configuration files
- You can create different configuration files for different scenarios
- Save configurations through "Profile" -> "Export"
Use keyboard shortcuts
Ctrl+P- Open profile menuCtrl+E- Enable/Disable proxy
Save traffic
- Set domestic websites to direct connection
- Only enable proxy for programs that need it