📋 Access Guide
Accounts:
Each user can create multiple accounts on the Account Management page, and each account can be assigned its own traffic threshold.Use Accounts to Log In on Devices:
Each device uses one account to connect to the proxy for convenience.
The proxy username should be the account name.Switching IPs:
Method 1: Switch IP by clicking the “Refresh IP” button
For example, to switch the IP of account
test1, go to the Proxy IP Configuration page, select thetest1account on the left panel, then click Refresh IP.
As shown in the image: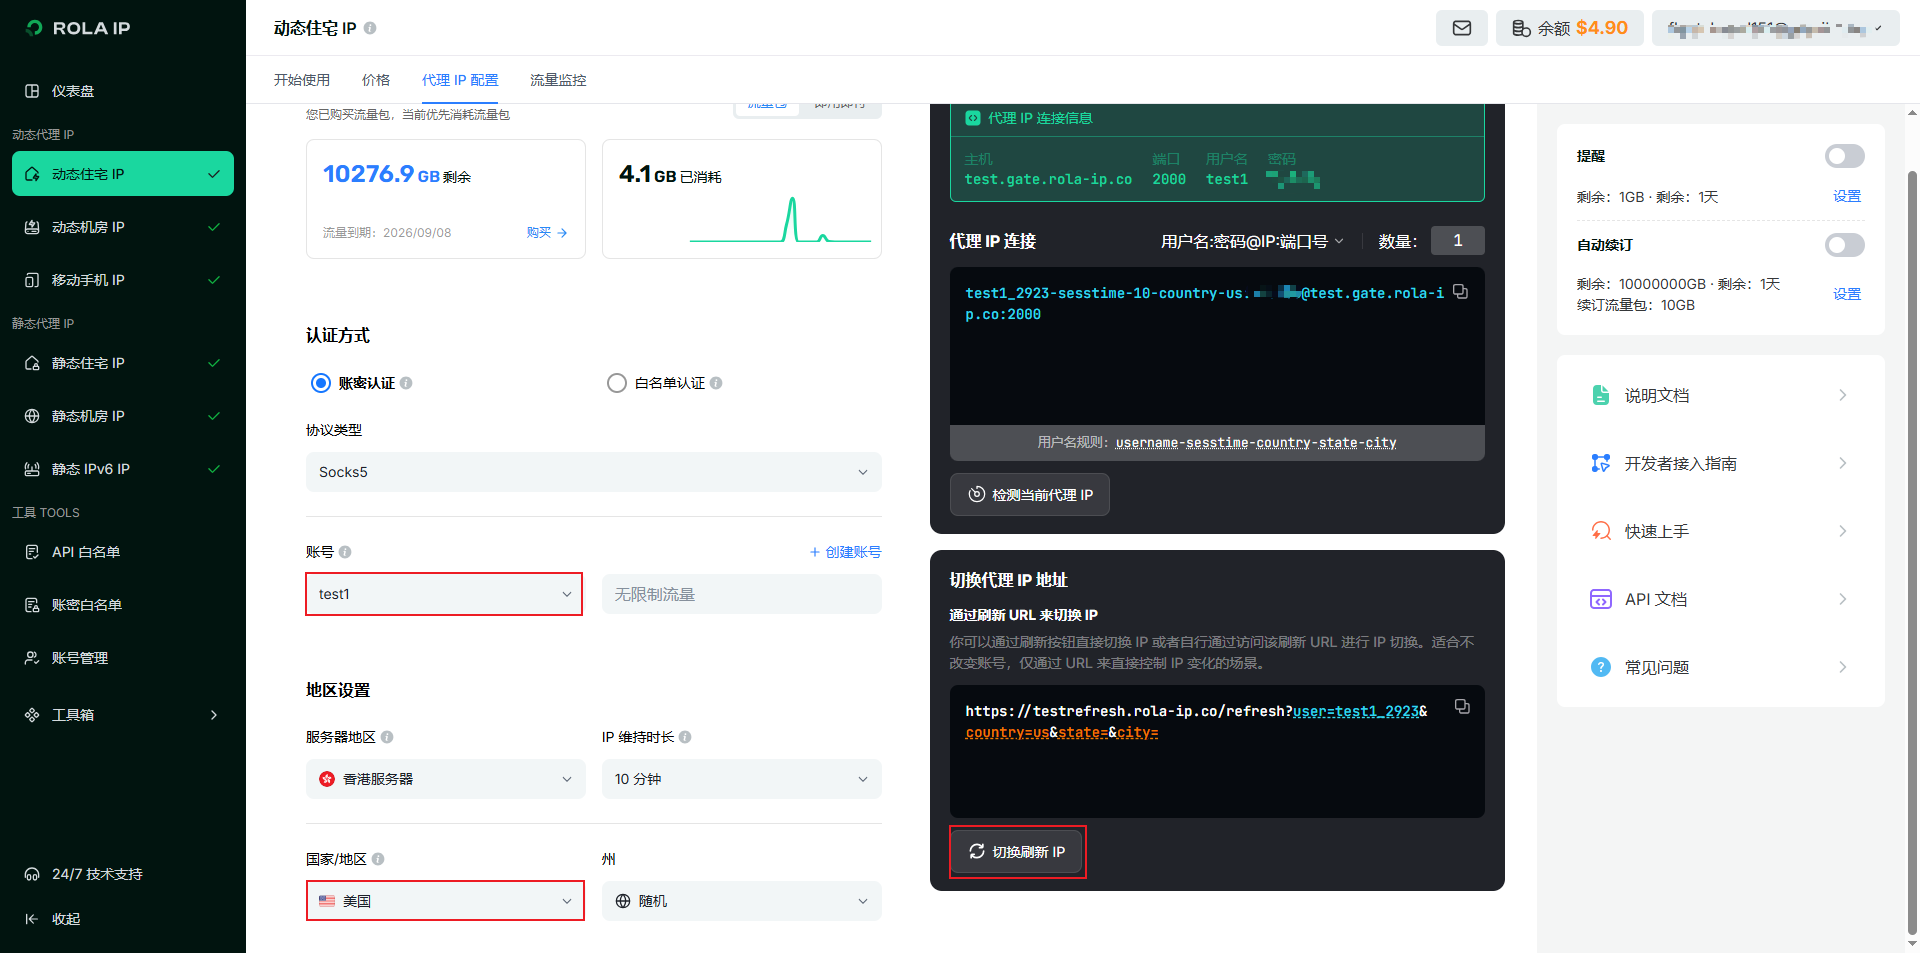
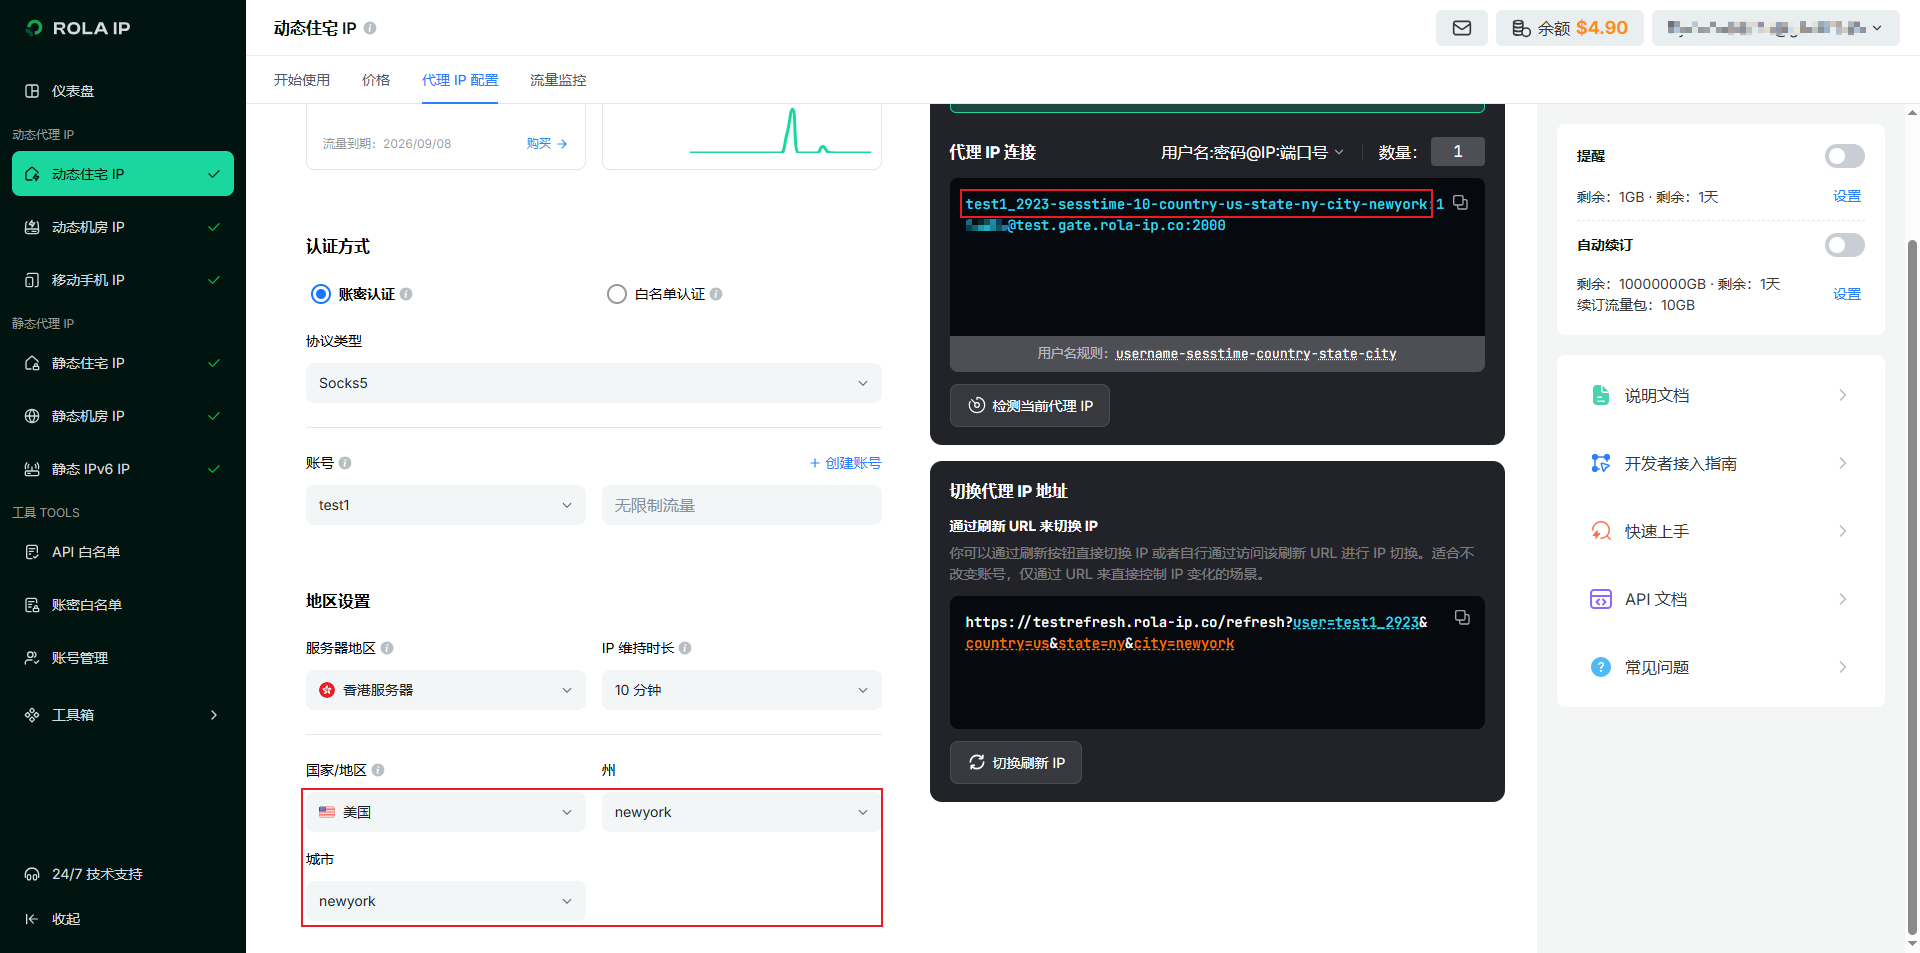
After switching, the latest IP oftest1becomes a US IP, while other accounts remain unchanged.Method 2: Switch IP by changing the account format
You may specify IP country/state/city through the account format:
- Specify IP country: Format:
account-country-countryCodeExample:test1_7651-country-us→ represents a US IP. - Specify IP country + state: Format:
account-country-countryCode-state-stateCodeExample:test1_778-country-us-state-ny→ represents a New York State IP (USA). - Specify IP country + state + city: Format:
account-country-countryCode-state-stateCode-city-cityNameExample:test1_778-country-us-state-ny-city-newyork→ represents a New York City IP.
As shown:
- Specify IP country: Format:
Traffic Summary & Billing by Account:
For example, the total traffic usage of user tom includes the combined traffic of test1, test2, test3, etc., and billing is calculated accordingly.
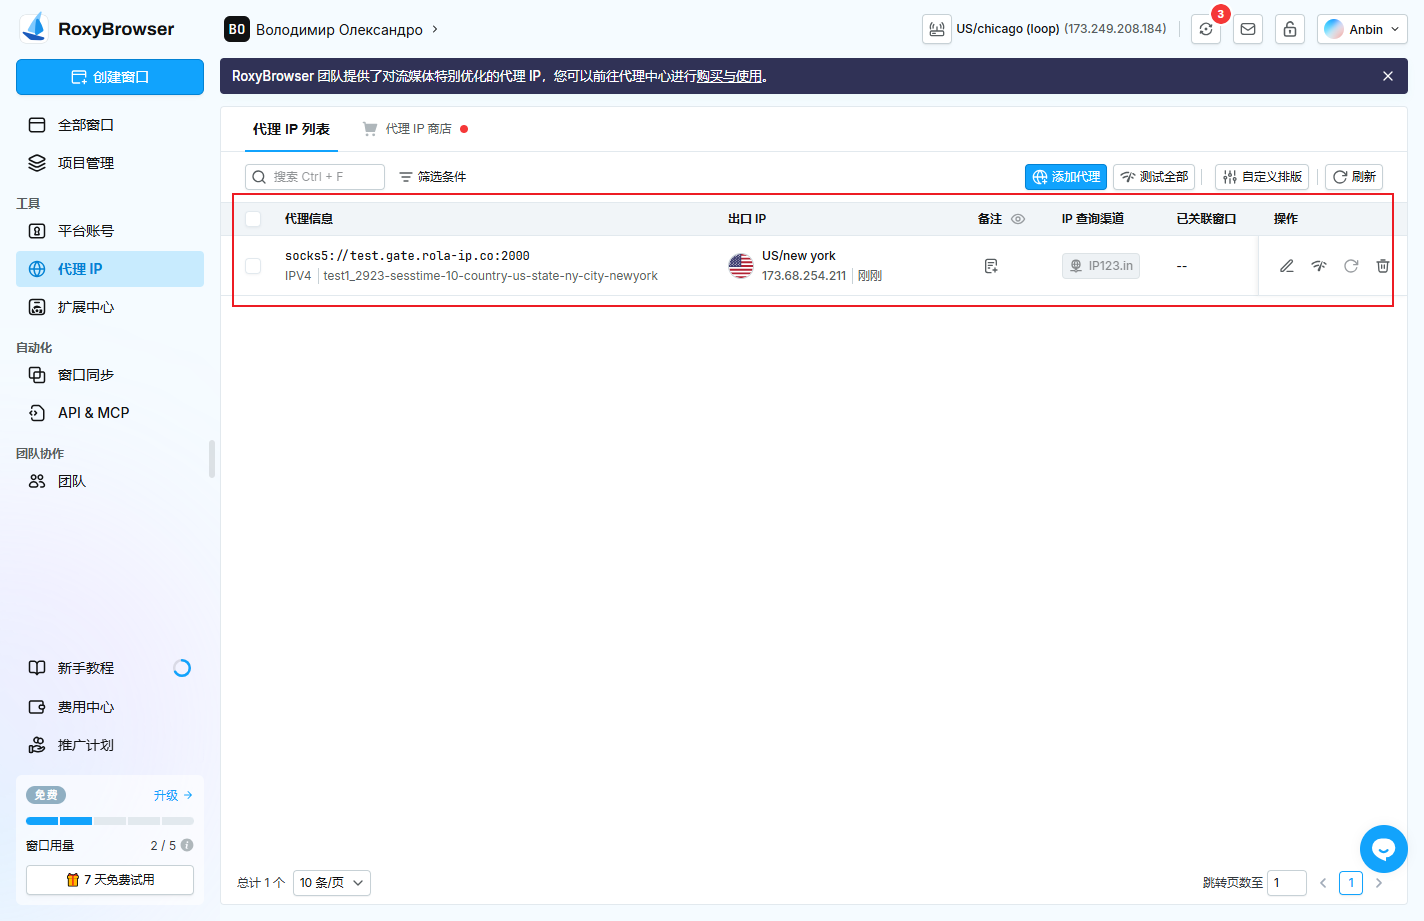
🌐 RoxyBrowser Integration
📌 About RoxyBrowser
RoxyBrowser is a professional fingerprint browser that supports multi-account management and proxy configuration (one of the most powerful fingerprint browsers).
Step 1: Download the Software
Download RoxyBrowser → Go to Download
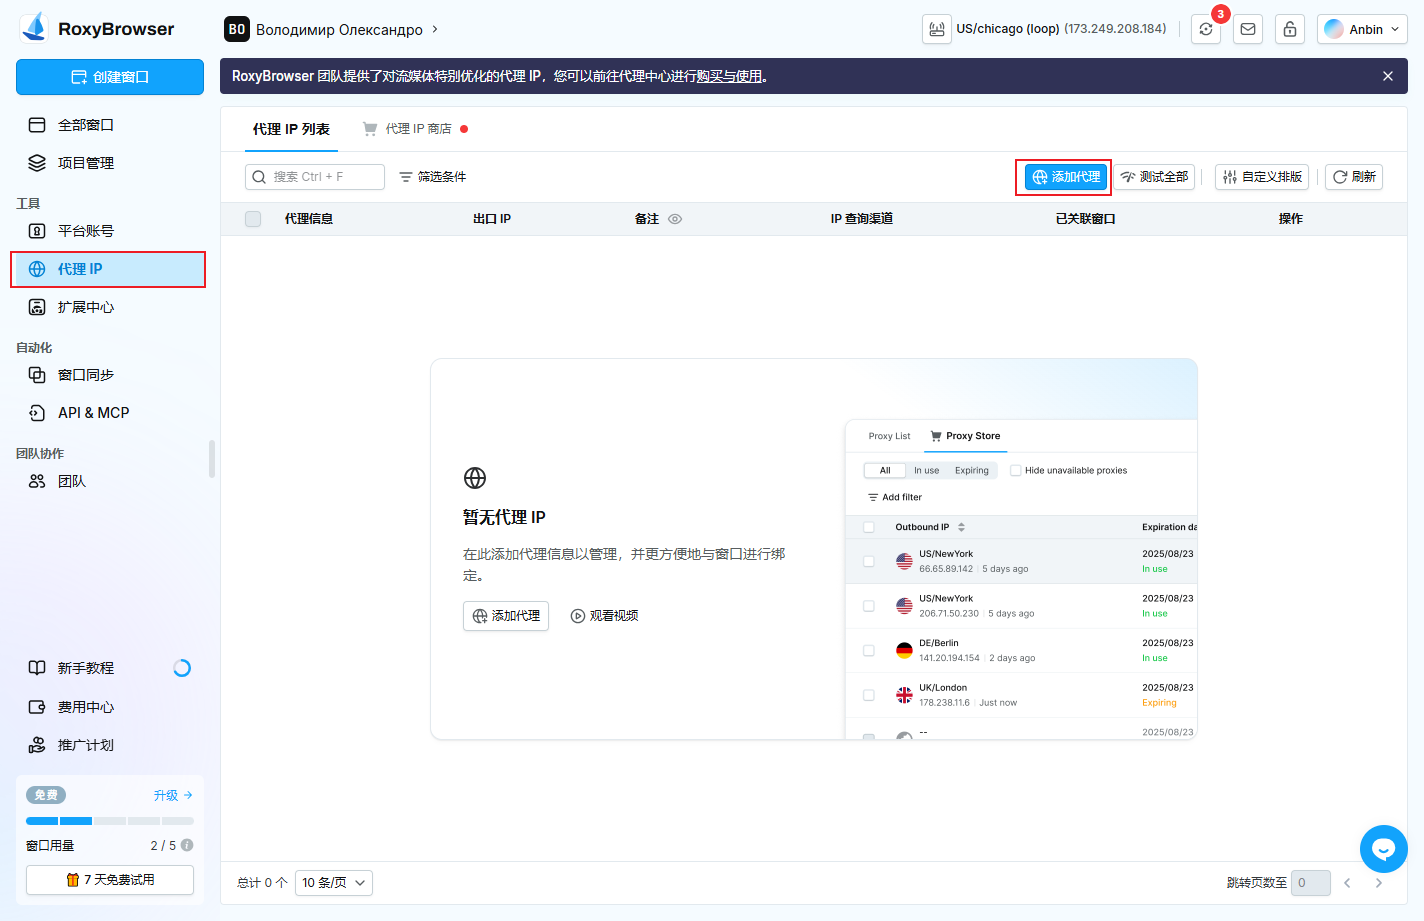
Step 2: Add a Proxy
Click Proxy IP on the left menu, then click Add Proxy.
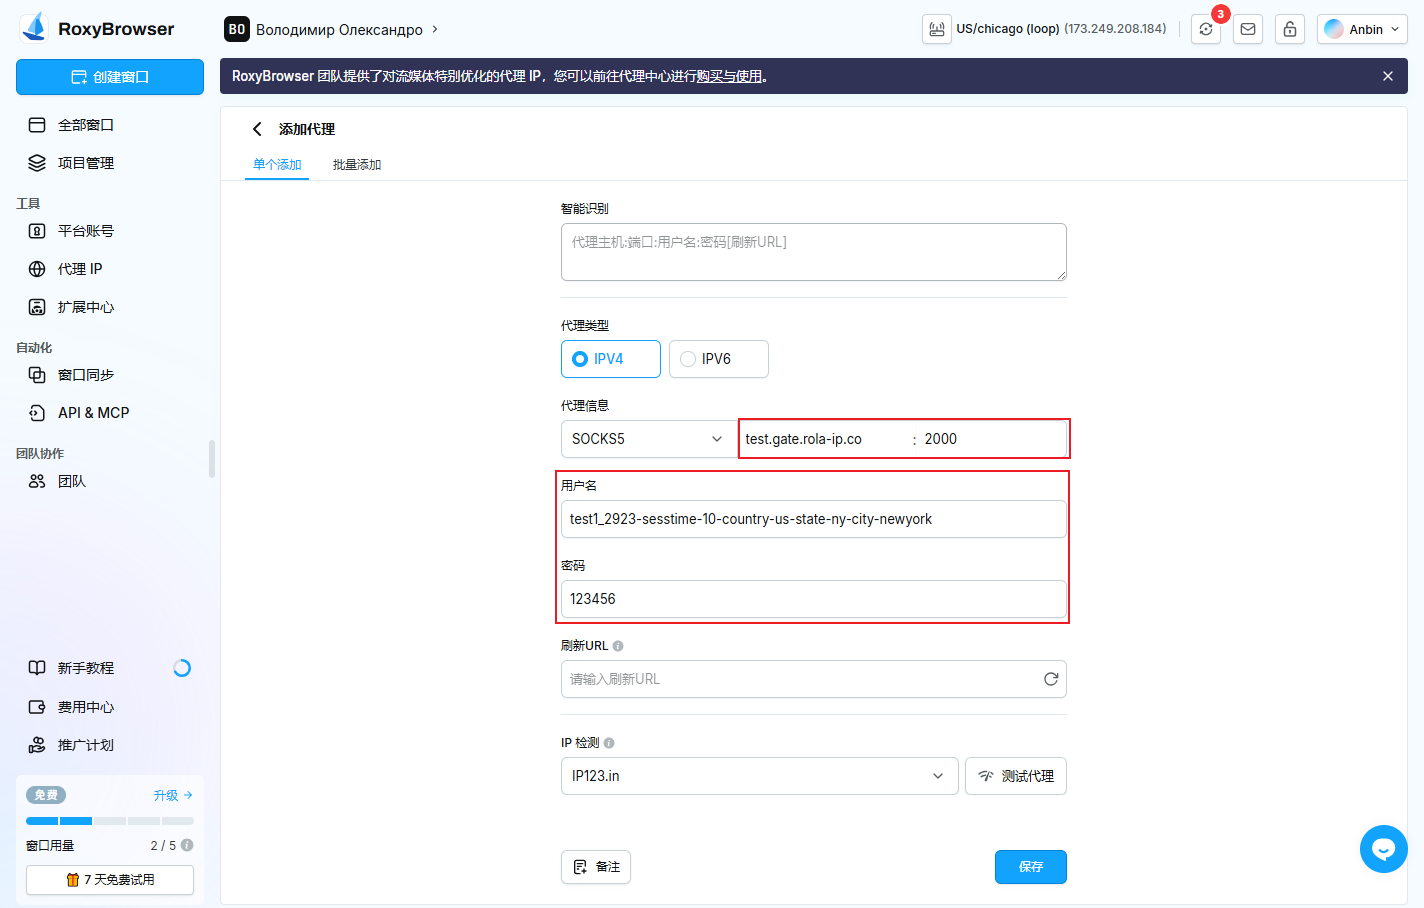
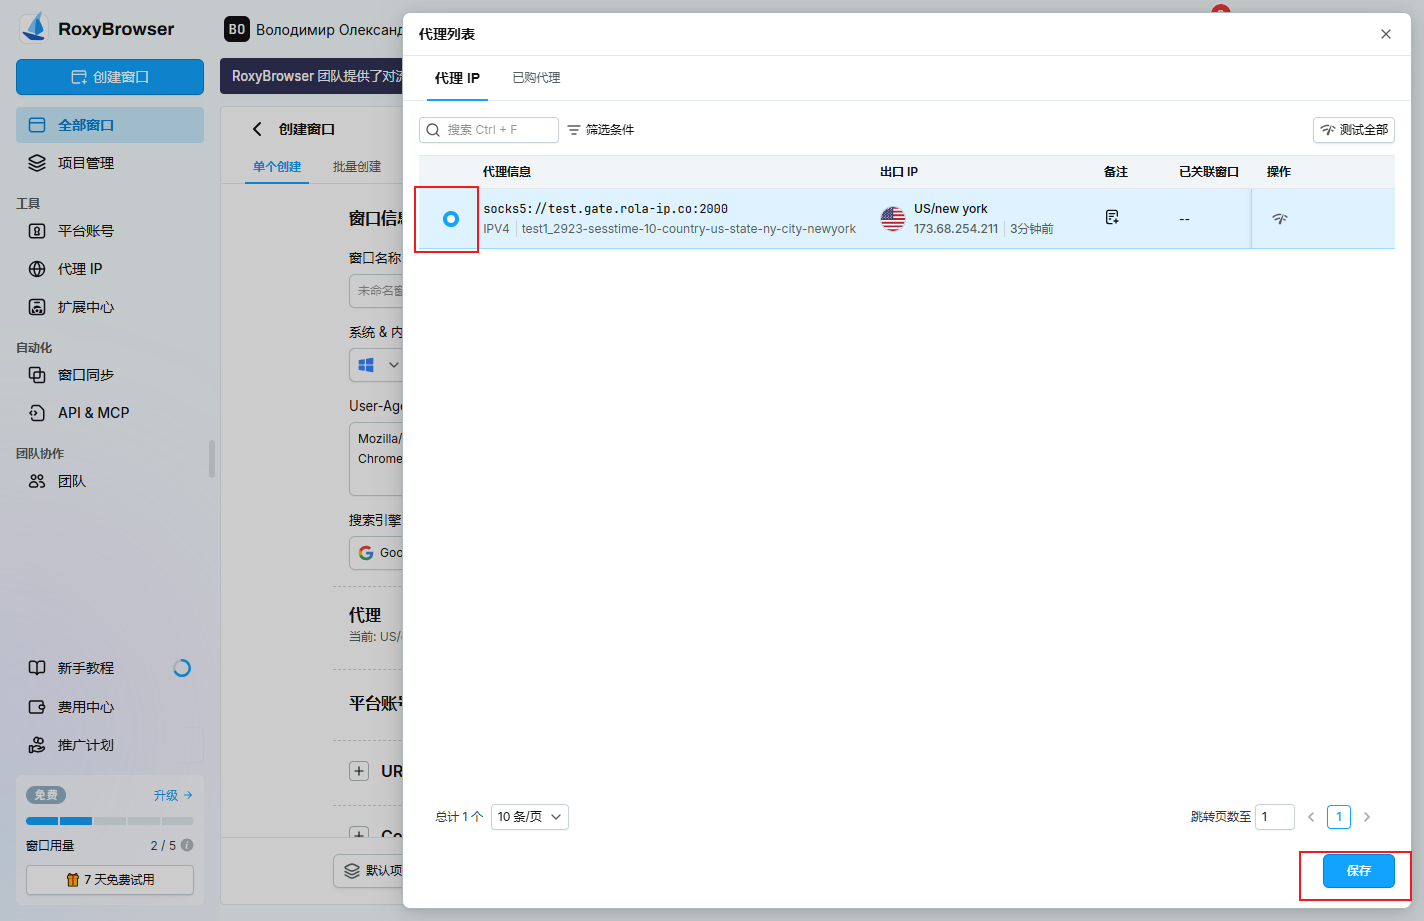
Step 3: Fill in Proxy Information
Enter Host, Port, Username, Password, then click Save.
Here is an example using Dynamic Residential IP:
📍 Where to Get Proxy Information
- Dynamic IP:
Go toDynamic Residential IP→Proxy IP Configuration - Static IP:
Go toStatic Residential IP→Proxy IP List
Step 4: Create a Window and Select a Proxy IP
Or assign a proxy to an existing window that does not have one yet.

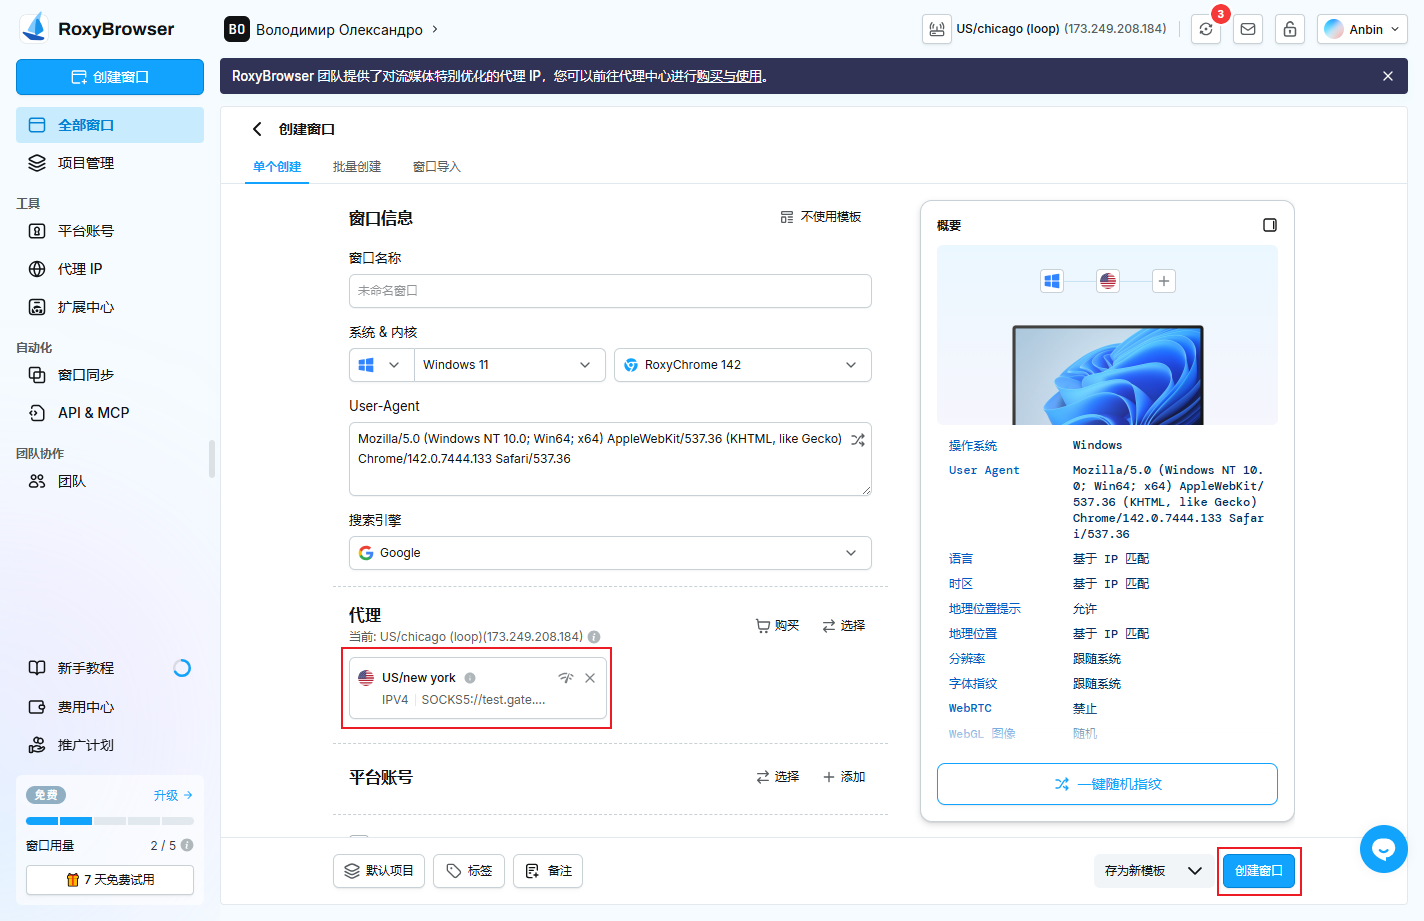
✅ Setup Complete
You can now use RoxyBrowser to browse websites normally!