
Account Management
Account Management is where you manage the accounts used for username/password authentication when connecting to proxies. You can create multiple accounts, assign them to different people, devices, or projects, and view each account's traffic usage and set traffic limits — keeping usage clear and isolated.
Entry: "Account Management" under the "Tools" group in the left menu.
What an Account Does
- One account = a username + password for credential authentication, entered when connecting to a proxy.
- Each account's Rotating Residential / Rotating Datacenter / Mobile IP traffic is tracked separately.
- Per account, you can set a traffic limit, enable / disable it, and configure the account whitelist (restrict which IPs may connect with that account).
Create an Account
- Open "Account Management → Account List".
- Click "Add Sub-account" in the top right to create one manually, or "One-click Add" to generate one quickly.
- Once created, the account's username and password can be used for credential-based proxy connections.
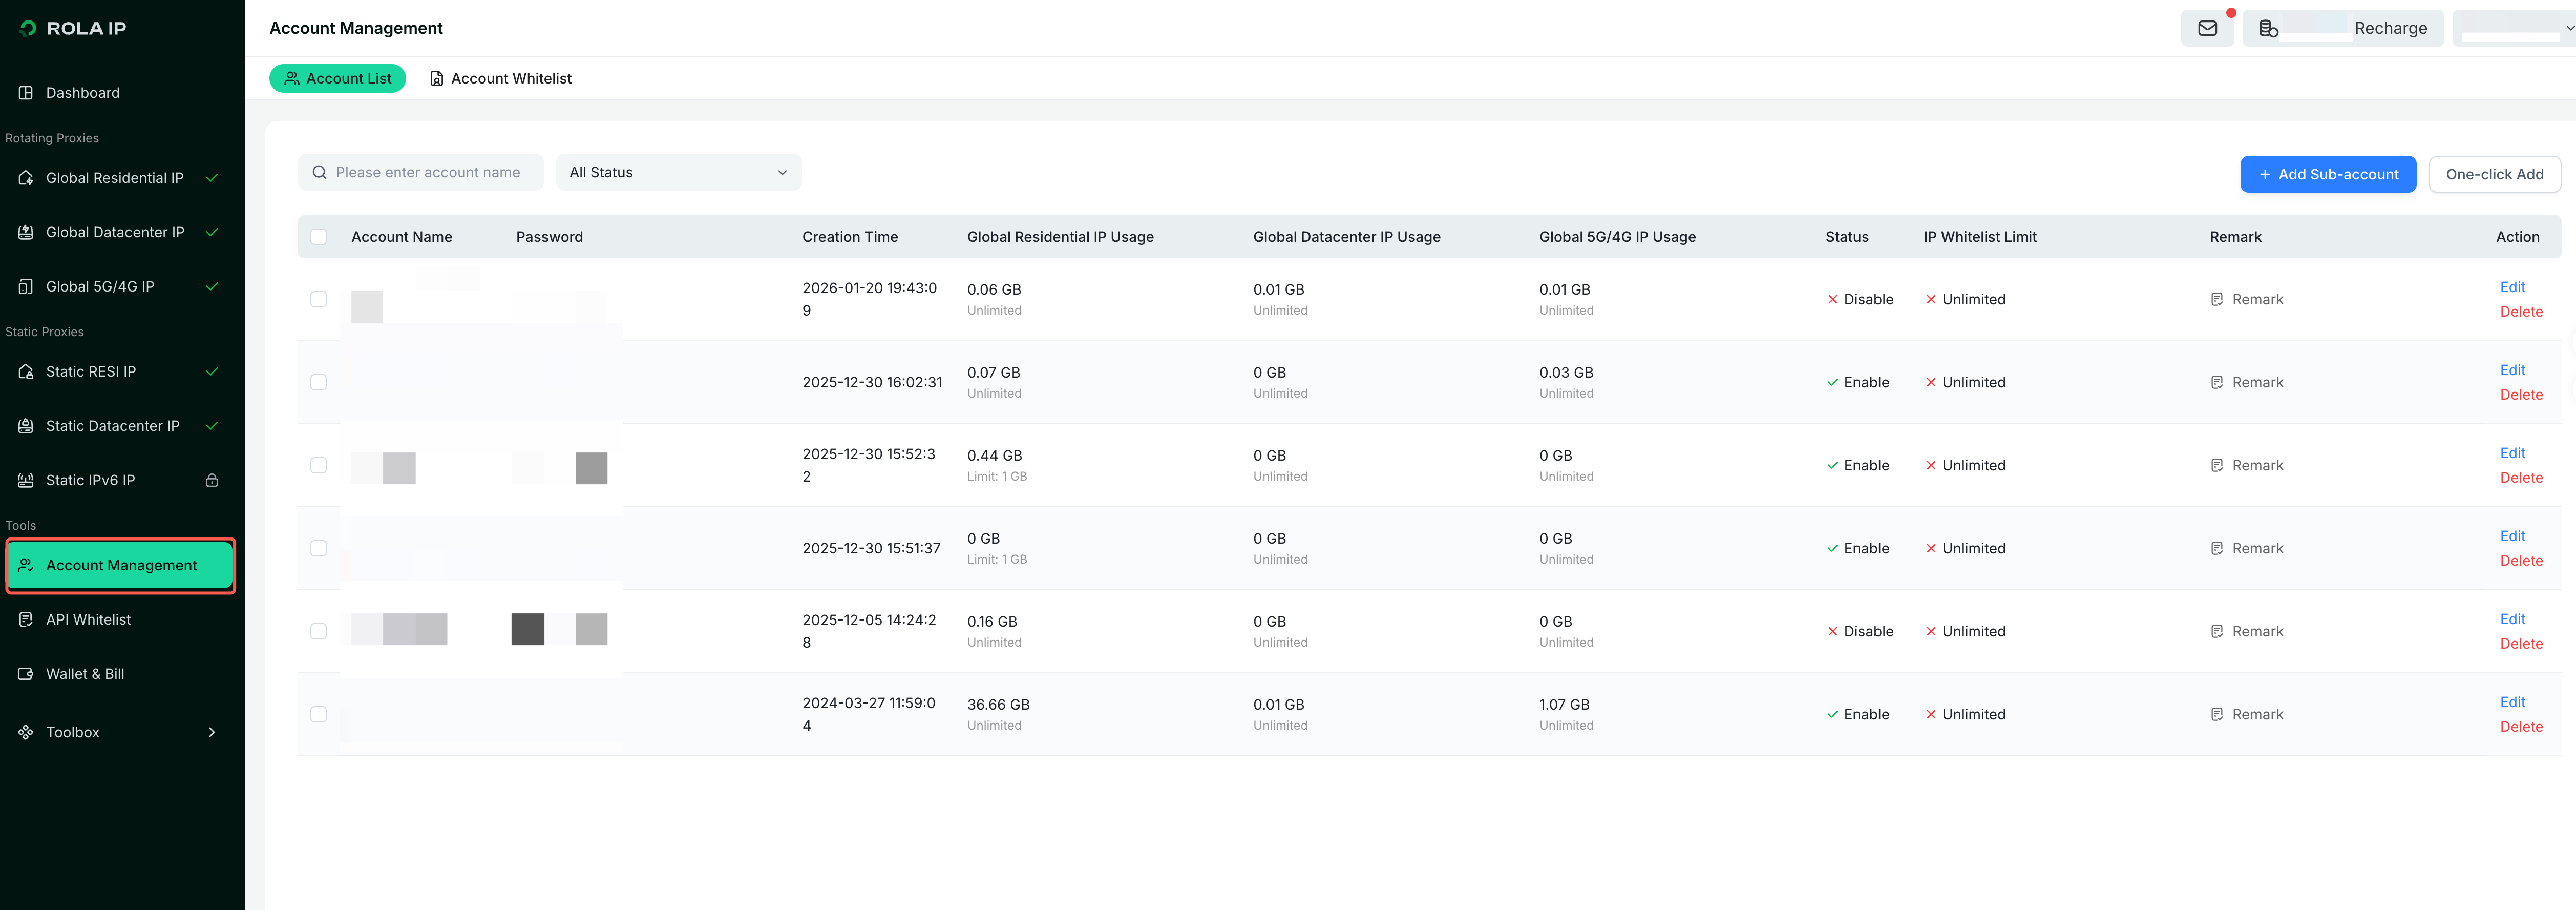
The list shows each account's creation time, used traffic / limit per IP type, status, IP whitelist limit, and remark.
View Usage and Set Traffic Limits
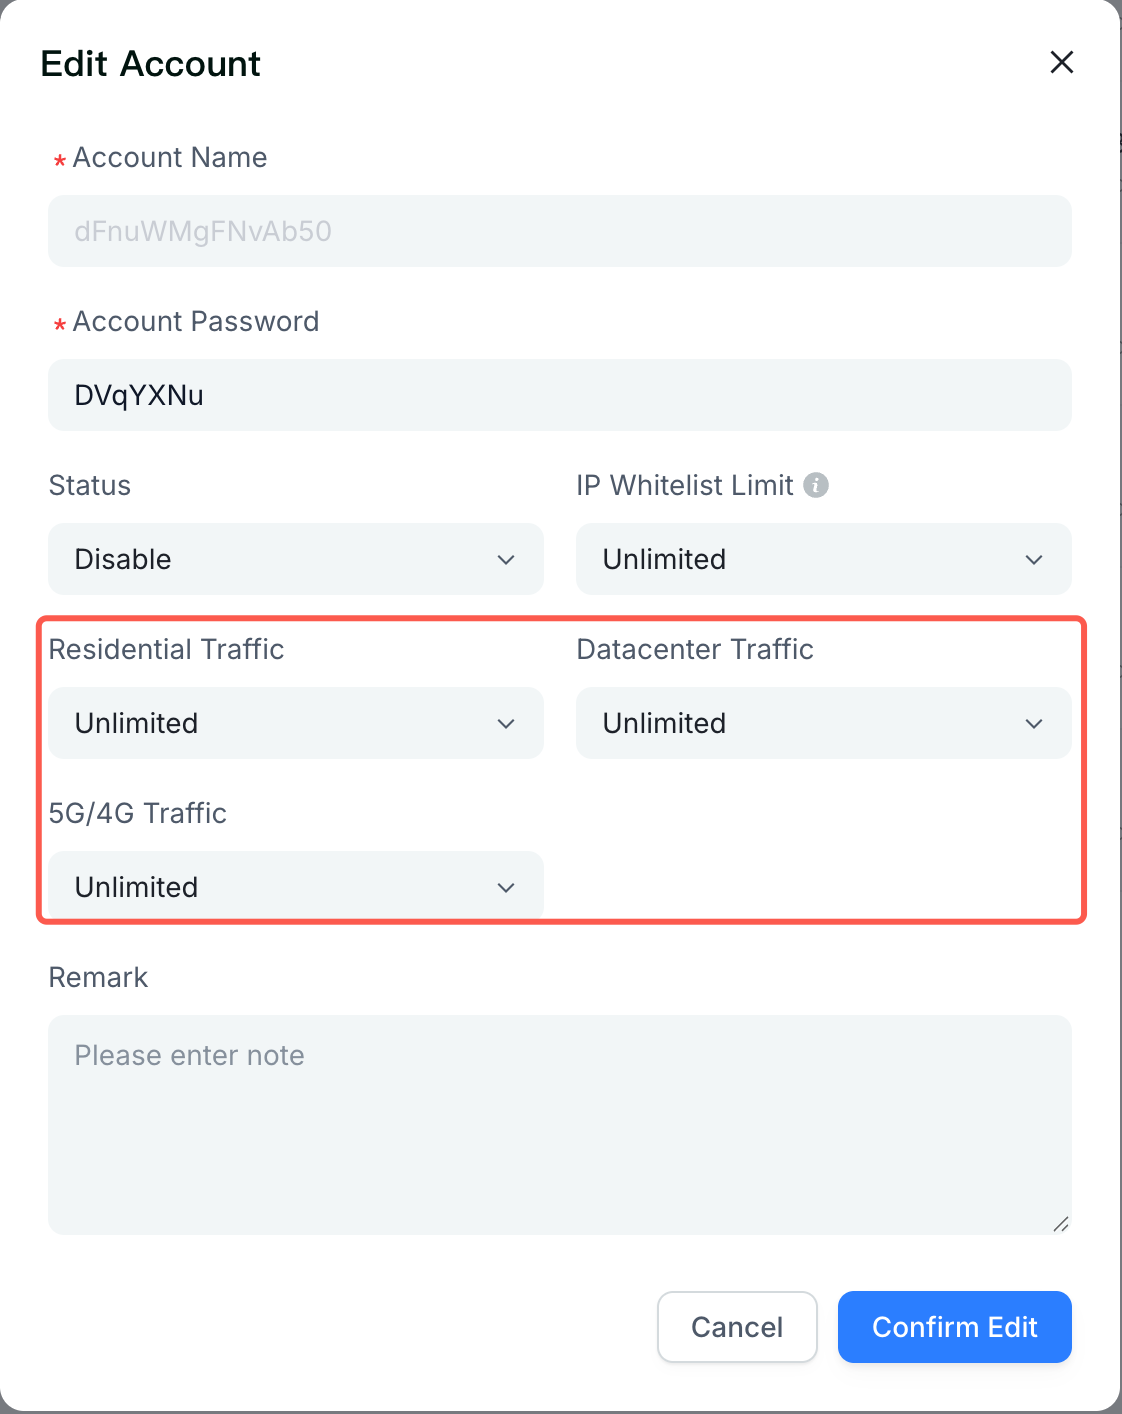
Click "Edit" on the right of an account. In the dialog you can:
- Change the account password;
- Set the status (Enable / Disable) — a disabled account cannot connect to proxies;
- Set the IP Whitelist Limit (used together with the account whitelist);
- Set a limit for Residential Traffic / Datacenter Traffic / 5G/4G Traffic individually (choose "Unlimited" or enter a specific quota);
- Add a remark to tell accounts apart.
Click "Confirm Edit" to save.
💡 Tip
- Traffic is tracked and capped per account: one account hitting its limit only affects itself, not the others.
- The account name can't be changed after creation; create a new account if you need a different name.
⚠️ Note
Deleting an account immediately disconnects any program currently using its credentials. Make sure nothing is using it before you delete.