Port Forward
Port forwarding opens a proxy you bought on a local port of your computer (e.g. 127.0.0.1:8870). A third-party app (anti-detect browser, scraper, script, etc.) just points to this local address to use the proxy — no proxy username or password needed.
Each IP maps to one local port, which is handy when you need to give different apps or accounts their own proxy.
Step 1: Create a Local Forward
- Open Rola Connect and sign in.
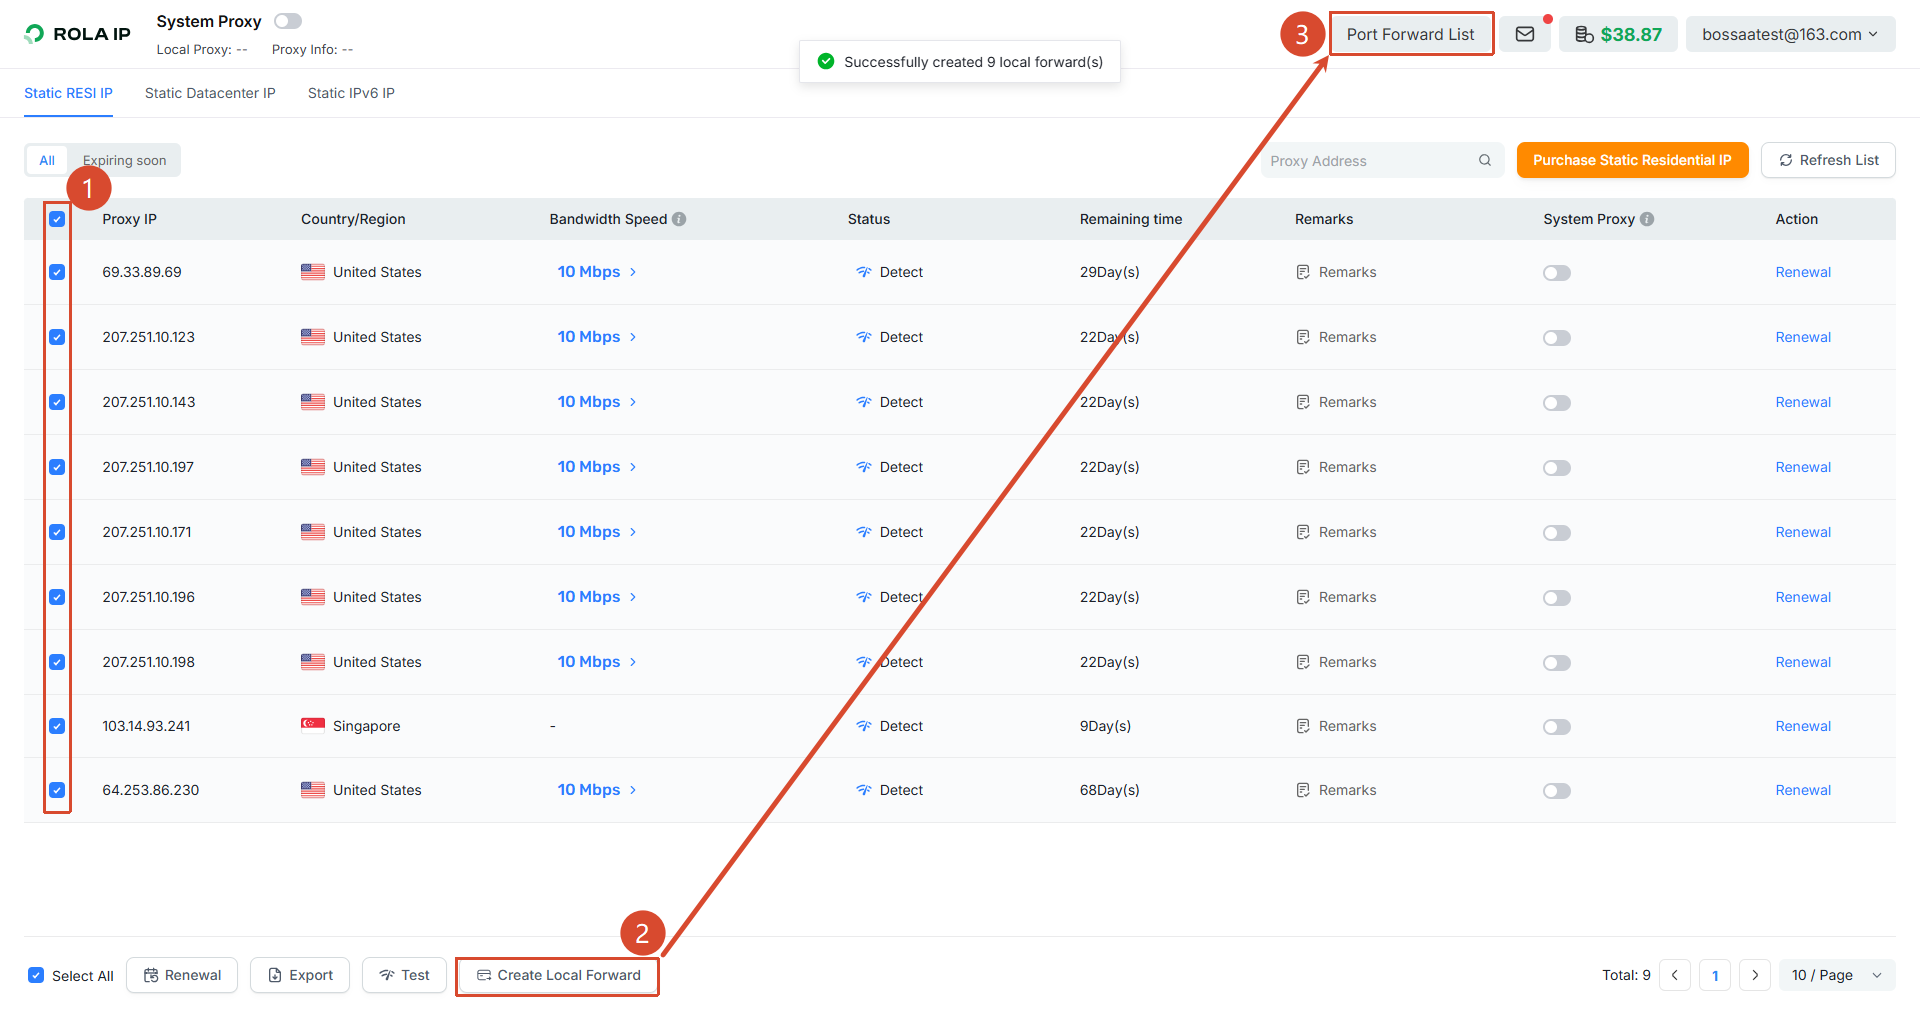
- Check the IP(s) you want to forward in the list (multi-select is supported — you can create several at once).
- Click "Create Local Forward" at the bottom. After it succeeds, click "Port Forward List" in the top right to see the local port assigned to each IP.
💡 Tip
Each IP you check gets its own local port. The forward list shows the mapping between "local address:port" and the proxy IP.
Step 2: Get the Local Address and Port
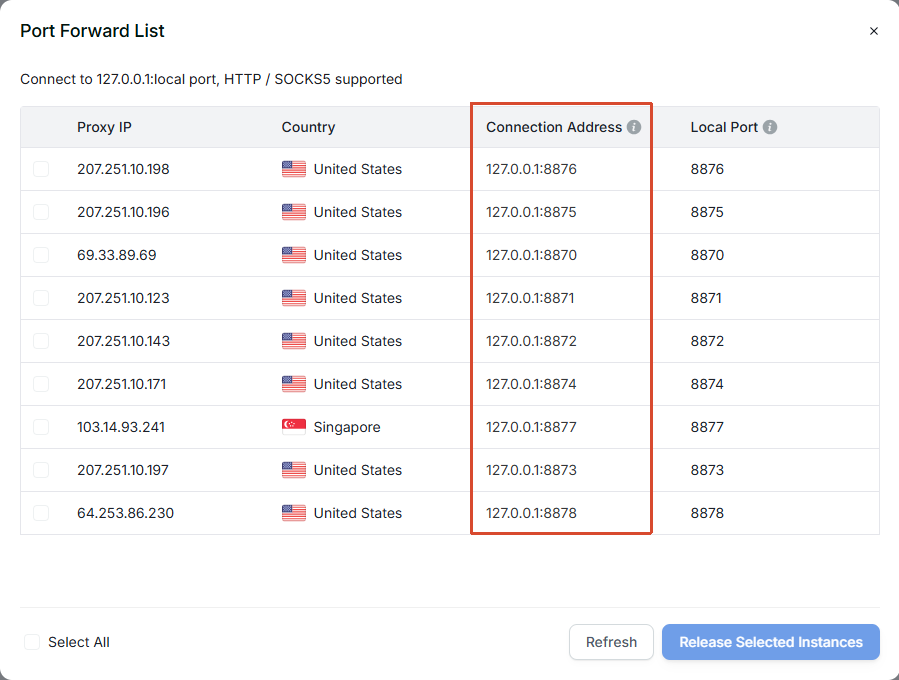
In the "Port Forward List", each proxy IP has a matching "Connection Address" and "Local Port". What the third-party app connects to is exactly this 127.0.0.1:local port (HTTP / SOCKS5 supported).
💡 Tip
Note down the connection address of the IP you want (e.g. 127.0.0.1:8870). This is a local address, not the proxy's real IP — requests first reach the local port, then the client forwards them to your chosen proxy exit.
Step 3: Fill It Into the Third-Party App
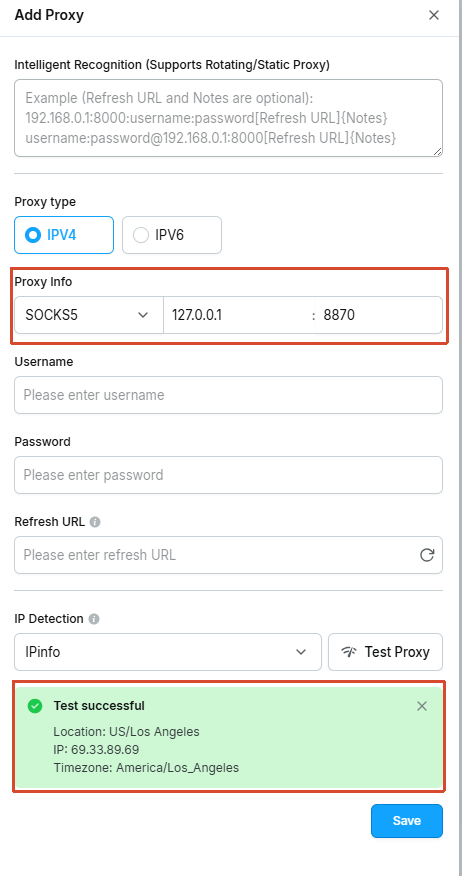
In the app's proxy settings, enter the following (using an "Add Proxy" dialog as an example):
- Protocol:
SOCKS5(orHTTP) - Host:
127.0.0.1 - Port: the local port for this IP from the list in the previous step (example:
8870) - Username / Password: leave empty
Then use the app's own "Test" button. If it shows the exit IP and location, the connection works.
⚠️ Note
- The local port only works while Rola Connect is running; closing the client drops the forward.
- If it won't connect, check that the port is correct and the client is running; the protocol can be either
SOCKS5orHTTP— local forwarding supports both.